Get Crafty this Winter Holiday Season
The winter holiday season is the perfect time to dust off your craft supplies. DIYing decor is not only a fun activity everyone can join in on, but it adds a personalized touch to your celebration, and you'll curb the temptation to buy new ornaments. Upcycling what's already in the attic is eco-friendly and innovative. Who says ornaments can only hang from the Christmas tree or wreaths only belong on the door? Definitely not Martha Stewart.
The guru of all things home has a slew of decoration tips to inspire DIYs outside the home and around the house. Stewart, who decks out her properties in 40 Christmas trees, knows a thing or two about setting up for the festive months. Hanging ornaments, wreaths, holiday cards, and other items lying around are given new life. Whether you're celebrating a specific holiday or just decorating for the winter, there is a DIY project to match your aesthetic.
Ornamental Table Runner
Looking for a unique and eye-catching centerpiece for your holiday table? Try making an ornamental table runner. This DIY project is a great way to add a festive touch to your dining area. You can use a variety of materials, such as fabric, ribbon, and ornaments, to create a beautiful and personalized table runner. Check out the video tutorial for step-by-step instructions on how to make your own ornamental table runner.
Get Creative with Holiday Table Decorations
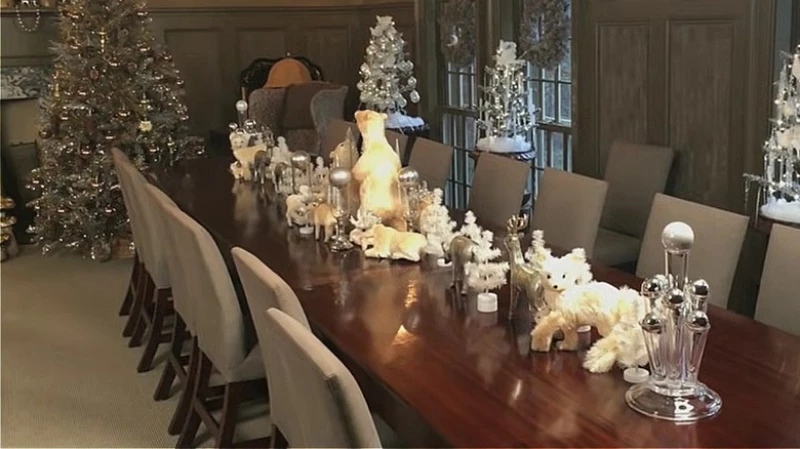
A holiday table runner is a classic way to decorate your dining room table, but why not try something different this year? Instead of using a traditional cloth runner, create a unique centerpiece using ornaments and other festive trinkets. This will add dimension and a touch of whimsy to your holiday table.
Start by choosing a theme for your centerpiece, such as "winter wonderland," "Santa's shop," or "Christmas glitz." Then, gather ornaments and decorations that fit your chosen theme. Stuffed animals, mini Christmas trees, candles, and other small trinkets work well for creating a dimensional runner.
Begin by placing larger pieces at the top of the table, evenly spacing them out. Then, fill in the gaps with smaller ornaments and decorations. Watch as your table comes to life with holiday cheer!
Light Up Your Centerpieces
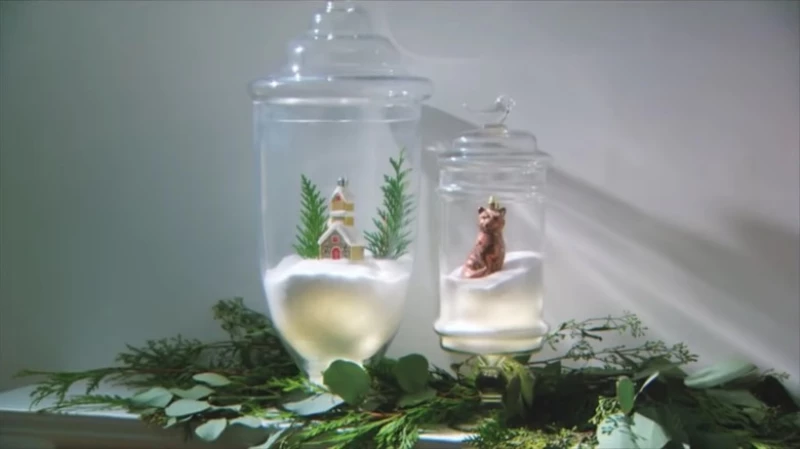
Add a touch of sparkle to your holiday table with these easy-to-make light-up centerpieces. To create this centerpiece, you'll need an LED string light, a large apothecary jar, a small drinking glass, coarse salt, tape, and ornaments.
Start by wrapping the LED lights around the glass cup and securing them with tape. Turn the lights on and insert the glass cup into the large jar, facing downward. Next, pour coarse salt into the jar to cover the mechanics of the lights. This will create the illusion of snow.
Now, it's time to decorate your frosty field! Add pine leaves, dreidels, figurines, or any other ornaments that you like. Get creative and make it your own!
Create an Ornament Tree
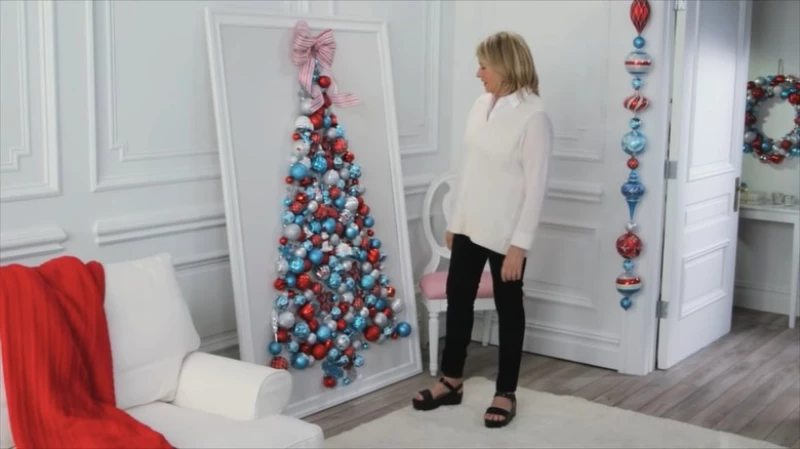
Another fun and festive centerpiece idea is to create an ornament tree. This is a great way to showcase your favorite ornaments and add a pop of color to your table.
To make an ornament tree, you'll need a small tabletop tree or a tree-shaped wire frame, and a collection of ornaments. Simply hang the ornaments on the branches of the tree, arranging them in a pleasing and balanced way. You can also add lights or other decorations to enhance the tree's beauty.
Place your ornament tree in the center of your table and watch it become the focal point of your holiday decor.
Paper tree skirt
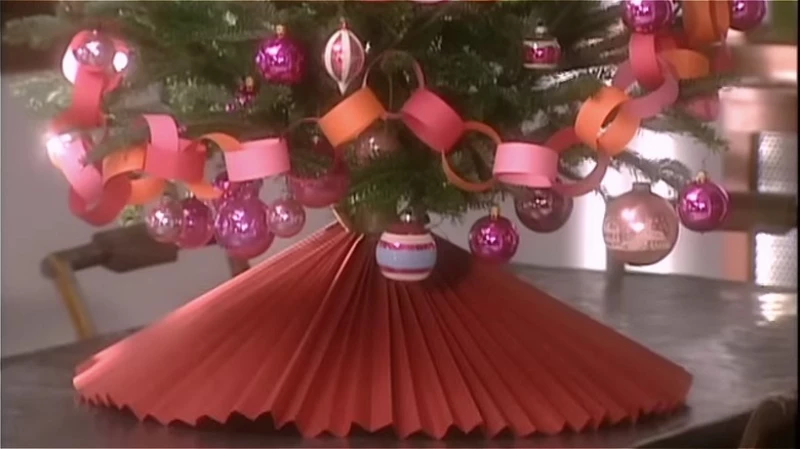
Changing your tree skirt is an easy way to give your seasonal decor a fresh look. Luckily, you can make one from Kraft paper and ribbon. Two 14 x 27-inch pages work for one tree. Start by holding the paper lengthwise and scoring every inch with a butter knife or popsicle stick. Then, fold accordion style, firmly creasing the edges. Now, punch a hole an inch from the top and thread a ribbon through the two pages. Glue the sheets at one end, and you're ready to tie the ribbed skirt around your Christmas tree.
Paper clay ornaments
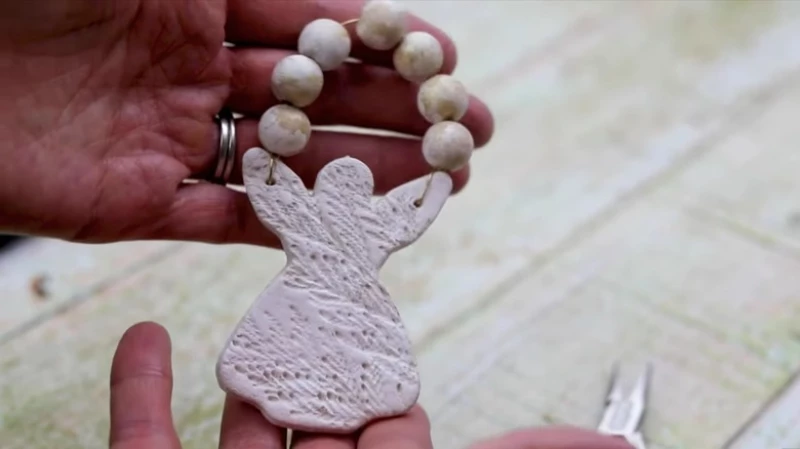
Paper clay ornaments are super simple to make. Molds and cookie cutters are the easiest way to transform the block into stylish decor. You can also imprint the rolled dough with leaves or flowers. Or even roll it into a ball and paint it. Just don't forget to add an eye screw at the top before you leave the clay to dry overnight so you can thread ribbon, twine, or strips of fabric and hang your homemade ornament.
Holiday planters
Creative Holiday Decor Ideas
Looking to add some festive flair to your home this holiday season? Check out these creative DIY decor ideas that are sure to impress your guests.
Festive Planters
Give your planters a festive makeover by adding a bed of evergreen branches, a wreath, and ornaments. Start by filling the base of your planter with bricks to keep it steady, and then stuff the rest of the pot with bubble wrap. Next, layer clippings from spruce, fir, or cypress trees to bring in the natural holiday feel. Add a wreath onto the leaves and cover the hole with ornaments. Customize the planter with your favorite greenery and trinkets. If you live in a windy area, be sure to glue your accessories together to prevent any runaways.
Coffee Filter Trees
Create adorable mini trees using coffee filters. This easy DIY project only requires glue, stock paper, and scissors. Start by rolling the stock paper into a cone shape and securing it with glue. Then, cut out the middle of the coffee filters, leaving only the ruffled ends. Glue the fringed paper in tiers onto the cone to create a set of three to five trees in varying sizes. These coffee filter trees will add a touch of winter wonderland to your decor all season long.
Holiday Card Garland
Turn your collection of holiday cards into a chic garland. Use clothespins to display the cards in a band of leaves, allowing the decorative covers to shine. For an extra festive touch, cover the clothespins in glitter tape, ribbon, or paint before attaching them to the garland. This DIY project is a great way to upcycle holiday cards and give them a second life.
Wreath Chandelier
Add a stunning focal point to your home with a wreath chandelier. Start by selecting a large wreath and attaching it to a ceiling fixture or chandelier. Then, embellish the wreath with ornaments, ribbon, and other festive decorations. This unique decor piece will instantly transform any room into a holiday wonderland.
Get creative this holiday season with these DIY decor ideas. Whether you're adding festive touches to your planters, creating coffee filter trees, hanging a holiday card garland, or designing a wreath chandelier, these projects are sure to bring joy and cheer to your home.
DIY Wreath Chandelier
A wreath chandelier is a fantastic way to add elegance to your holiday decorations. It's a unique and creative way to use the wreaths you already have. Here's how you can make your own:
Materials:
- Medium-size wreath
- Large-size wreath
- Two 46-inch ribbons
- Two 76-inch ribbons
- Carabiner latch
- S-hook
- Ornaments (optional)
Instructions:
Two-Tier Chandelier:
- Tie both ends of the two 46-inch ribbons to your small wreath.
- Attach a carabiner latch to an S-hook.
- Hang the ribbons from the carabiner latch.
- Repeat the ribbon ties for the large wreath using two 76-inch strips.
- Thread the 76-inch ribbons through the center of the top tier wreath.
- Hook the ribbons to the carabiner latch.
- Add ornaments to the wreaths for extra decoration.
One-Tier Chandelier:
- Choose any size wreath for the one-tier chandelier.
- Tie both ends of the ribbon to the wreath.
- Attach a carabiner latch to an S-hook.
- Hang the ribbon from the carabiner latch.
- Add ornaments to the wreath for extra decoration.

